Showing posts with label free pattern. Show all posts

Friday, August 20, 2010

Camera cosy

I got a new camera for my birthday in May but it came without a cover. So I made one. My little camera (Panasonic Lumix DMC-TZ10, Swedish link) is rather fat and I didn't find a pattern that fitted it well, so I made up my own. I really recommend the camera by the way. It has a fast 25-300 mm zoom lens, image stabilizer, the pictures have correct colours mostly, 12 megapixels, great autofocus, and more. It also has a built in GPS so the pictures contain info on where they are taken, fun when you are on vacation!

Anyway, here is the pattern for the camera cosy, enjoy! Please excuse the crappy iPhone pics though...


Materials
  • sock yarn leftovers, I would recommend a squishy yarn that doesn't shed too much. I used 10 grams (about 45 m/50 yd) of Cherry Tree Hill Sockittome in Sugar Maple
  • needles for working in the round, I used a 2.25 mm circ for Magic Loop
  • crochet hook for provisional CO

Gauge
about 14 sts/5 cm (2")

Instructions
My numbers are in brackets, have your camera handy to make a custom fit. Remember that the cosy should be snug with some negative ease.

Provisional CO (crochet around the needle with waste yarn, google it!) for the width of the camera (18 sts), work stockinette for the thickness of the camera (2,5 cm/1") slipping first st on every row. End with a RS row. This makes a rectangle the same size as the short side without the wrist strap.

Pick up 1 stitch in each slipped stitch on the short sides (2x5 sts) and unzip the provisional CO (16 sts for some reason, I was expecting 17) and start working in the round (44 sts) If you want 2x2 rib at the top the number of stitches has to be divisible by 4, fudge as necessary. Knit until the cosy is about 2 cm/1" shorter than camera (8 cm/3" from the picked up side stitches) and then work 2x2 rib until cosy reaches the top of the camera (try it on).


On the next round make a nice little hole for the wrist strap: Work 2x2 rib until 1 k before a purl valley that suits the position of the wrist strap. ssk (one knit and one purl stitch together), double yo, k2tog (one purl and one knit stitch together). On the next round k1, p1 into the double yo. On the round after that p2 to continue the 2x2 rib. Work rib until cosy is 1-2 cm/0.5-1" longer than camera when on. BO loosely.

Copyright Malin Nilsson 2010. This is my original pattern. Be nice, don't copy it and say it's yours,  don't sell it, and don't sell items made from it.

Saturday, May 09, 2009

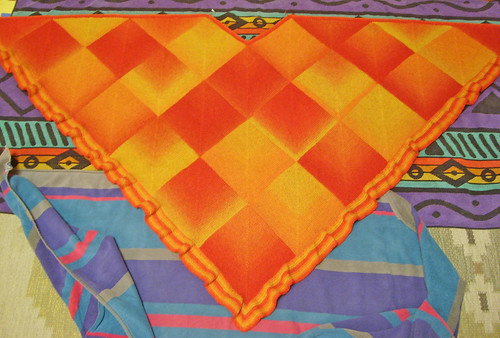
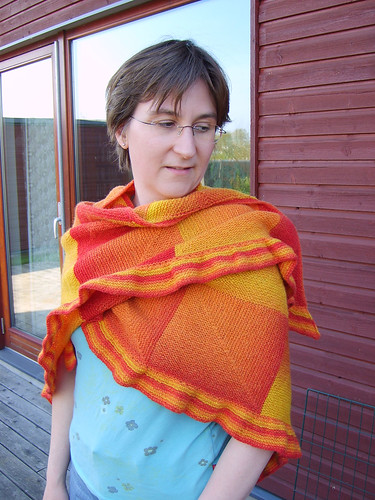
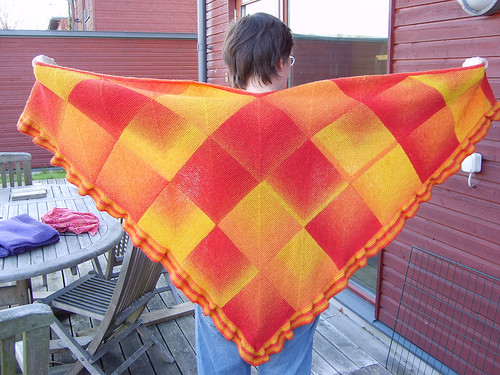
Domino Sunset Shawl

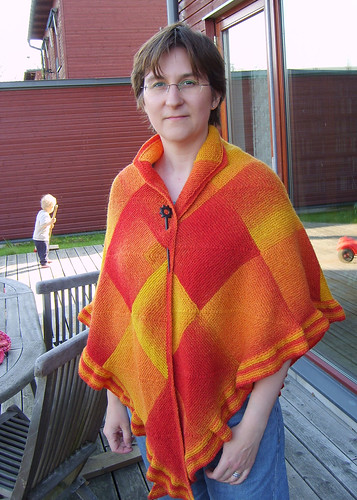
I've finally managed to write up the pattern for my domino knit shawl. Enjoy! I'm very fond of my shawl, it's big and cosy to wrap up in on a chilly evening. (ED: I forgot to credit Sabine for the idea. I saw her shawl on Ravelry and was inspired to make my own version. She also gave some hints on how to get started. Thanks Sabine!)
Please contact me if you find any errors or oddities! Or if you need help. I've done my best to write this up as clearly as I can, but you never know.


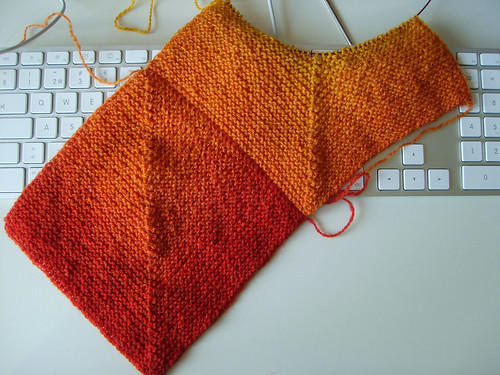
The shawl is started at the tip and worked row by row from right to left. You can make it with any size squares. Just cast on an odd number of stitches. Swatch and play with different sized squares to see what suits your yarn. Do you want solid squares or striped? Big or small?

The nice thing about working from the tip is that you can check the size as you go and stop when the shawl is just the right size. I blocked my shawl very lightly so it hardly grew at all. If you don't like my special neck, just fill in the space with another triangle.

Try to weave in the ends as you go, either when knitting one of the first rows of a new square or with a needle after knitting a few squares.

Yarn: Kauni Effekt EU (yellow-orange-red) or another yarn with loooong colour shifts. I used 1570 m (1720 yards), you'll need more if you want a wider and/or rufflier edge than mine.
Needles: 3 mm (or size to get a fabric you like) circular needle
Gauge: 24 stitches/10 cm (4”) The sides of my squares are about 18 cm (7”) long.
Size: about 188 cm (74”) across the top edge and 94 cm (37”) down the back, including the 5 cm (2”) wide ruffle.

Square 1 (tip)
KCO 81 sts.
Row 1: Knit until 1 stitch remains, p1.
Row 2: Sl 1 kwise, k 38 (until 1 stitch from middle stitch), sl 1 kwise, k2tog, psso, k38, p1.
Row 3 (and all odd rows): Sl 1 kwise, k until 1 stitch remains, p1.
Row 4 (and all even rows): Sl 1 kwise, k until 1 stitch from middle stitch, sl 1 kwise, k2tog, psso,k until 1 stitch remains, p1.
Work until you are about to start a right side row and you have only three stitches on the needle: sl 1 kwise, k2tog, psso. Pull the stitch a little larger, cut yarn and pass the end through the stitch. Do not pull tight. This is the ”waiting stitch”, you will use it later.

Square 2 (right edge)

Right edge square: KCO 40 sts, PU 41 sts from the left edge of square 1, leave the waiting stitch from square 1 alone. 81 sts.
Row 1: Sl 1 kwise, knit until 1 stitch remains, p1.
Proceed from row 2 on square 1.


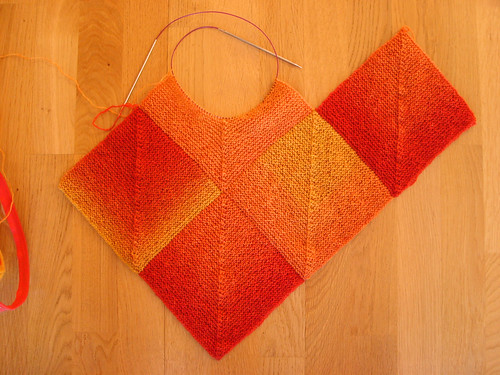
Square 3 (left edge)
PU the waiting stitch from square 1, plus 40 along the right edge of square 1, KCO 40 stitches. 81 sts. Row 1: Knit until 1 stitch remains, p1.
Proceed from row 2 on square 1.

Square 4 (right edge)
As square 2

Square 5 (inside)
PU the waiting stitch from square 2, plus 39 stitches along the left edge of square 2, 1 stitch in the middle of the V between squares 2 and 3 and 40 sts along the right edge of square 3, leave the waiting stitch from square 3 alone. 81 sts.
Row 1: Sl 1 kwise, knit until 1 stitch remains, p1.
Proceed from row 2 on square 1.


Square 6 (left edge)
As square 3


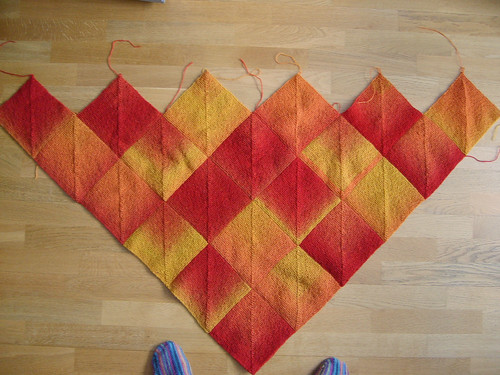
Keep working like this, adding rows of squares until you have 6 rows of squares or the shawl is the size you want it to be.


Top edge Triangles
Knit the triangles just like the squares but add a decrease at the beginning of every row by working an ssk instead of the sl 1. When 4 sts remain: ssk, k2tog, slip first st over the second, cut the yarn and pull out the end.
Leave out the middle triangle for slimmer fit around the neck.


Top border
PU stitches all along the top edge, one stitch in each ssk, from the right side. The exact amount is not important, I didn't count mine, but don't pick up too many, the finished edge should be nice and flat.
Round 1: Sl 1 kwise, knit to end, p 1.
Round 2: Sl 1 kwise, kfb, k to neck edge, kfb, kfb, k to neck center, sl 1 kwise, k2tog, psso, k to neck edge, kfb, kfb, k to end, p1.
Repeat round 1 and 2 for a total of 3 garter ridges. BO loosely. Do not break yarn but go directly to the side border (2 ends less to weave in!)


Side borders
PU stitches along both side edges, including the top border, one stitch for each CO stitch, from the right side. Use a very long circ if available. I used two shorter circs, one for each side. The exact amount of stitches is not important, I didn't count mine (I didn't want to know)
Row 1: Sl 1 kwise, knit to end, p1.
Row 2: Sl 1 kwise, *kfb, k1* to end, p1. I did an extra kfb at the center stitch, but it doesn't really matter. This makes a moderately ruffly edge. If you want a very ruffly edge kfb in ever stitch instead, but you will need lots more yarn.
Row 3: Sl 1 kwise, knit to end, p 1.
Row 4: Sl 1 kwise, kfb, knit to center, kfb, kfb, knit to end, p1.
Repeat row 3 and 4 until it looks right. I did 11 ridges (because I didn't have more yarn) but I think 20 ridges (half the width of a square) would look nice. BO loosely.


Finishing
Weave in all ends and block lightly. I gave my shawl a bath, squeezed out the water and smoothed it out on towels to dry with just a few pins at the top edge.


Abbreviations
KCO: Knitted cast-on. Use it! It makes a good edge for picking up stitches.
sl 1 kwise: Slip 1 stitch knitwise
sl 1 kwise, k2tog, psso: Slip 1 stitch knitwise, knit 2 stitches together, pass the slipped stitch over the new stitch. 2 stitches decreased.


Copyright Malin Nilsson 2009. You may not sell this pattern or any products made from it.
Tuesday, November 13, 2007

Baby mittens

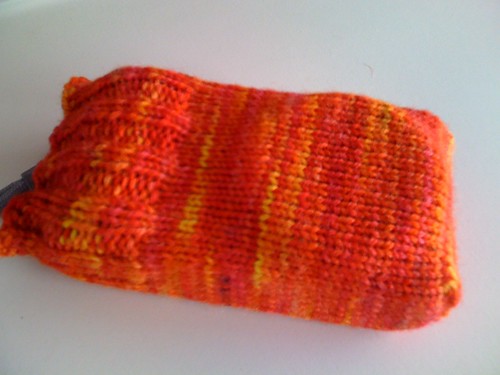
A needed mittens so I made some from the same yarn as his djevellue. I just love how they striped!

Size: 3-9 months
Yarn: Thickish fingering yarn, 65 meters/70 yards
Gauge: 32 sts/10 cm (4”)
Needles: 3 mm (US 2,5) needles or size to get gauge

Cuff: CO 32 sts (I use long-tail CO) join for knitting in the round. Rib k1, p1 for 4 cm/1,5”, 13 rounds.
Hand: Switch to stocking st. Increase 8 sts evenly on the first round (k1bf, k3 around), 40 sts. When hand measures 8 cm/3,25”, 30 rounds after increase round, decrease for top:
Round 1: k2, k2tog around, 30 sts
Round 2: knit
Round 3: k1, k2tog around, 20 sts
Round 4: knit
Round 5: k2tog around, 10 sts
Round 6: knit
Round 7: k2tog around, 5 sts

Cut yarn and thread through the remaining sts, weave in ends. Make another mitten. Make an i-cord or crochet chain about 67 cm/27” long and sew one mitten to each end. Thread through sleeves to avoid loosing mittens.

Thursday, October 25, 2007

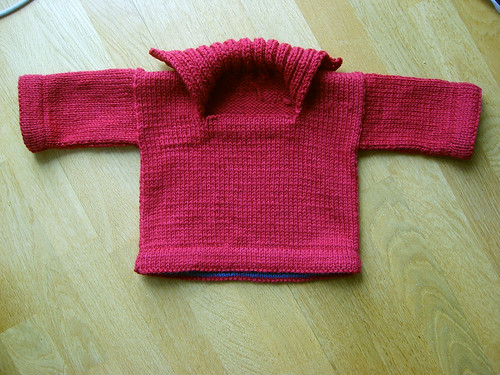
Rudyard baby sweater

When I saw Kim's pattern for Kipling I just had to make it. But it was very small and when I tried to make the pattern larger I got confused by the sleeve construction. So I made my own version, and of course it had to be named Rudyard!

Rudyard


Size: 6 months

(cm)


Yarn
Garnstudio Alaska (75 m / 50 g) 100% wool
6 balls main colour 11 (dark red)
1 ball contrasting colour 52 (blue), or an extra ball in main colour

Needles
4,5 mm (US 7) needles, or size to get gauge
1 thin extra needle, 2 mm (US 0) or so

Gauge
18 m = 10 cm (4”)

Back
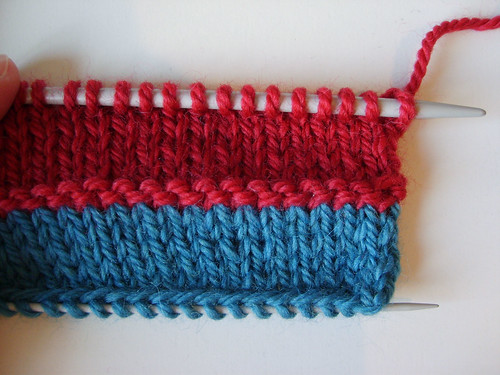
CO 50 sts in contrasting colour using longtail CO. Work 5 rows (2 cm, 0,75”) stocking stitch, 1st row is a purl row. Switch to main colour. Knit 2 rows for folding edge. Work 6 rows stocking stitch, first row is knit. Weave in all ends (except working end)

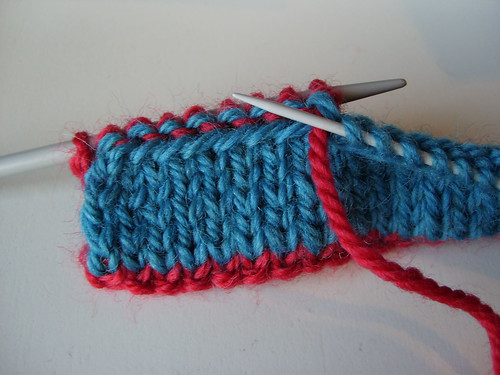
On the next round (right side) the CO edge is knit together with the sts for a neat hem. If you find this too fiddly, just ignore this section and sew down the hem when finishing the sweater.

Pick up 48 sts from the CO round with a thin needle.

The edge with picked-up sts

Knit 1. Knit 1 stitch from the ordinary needle together with one stitch from the extra needle 48 times. Knit 1.

K2tog, one st from each needle

From the back

The finished hem

Work in st st until work measures 28 cm (11”) from the bottom. Put sts on a thread.

Front
Work like the back. When work measures 21 cm (8,25”) the middle 18 sts are put on a thread. Work each side separately until they measure 28 cm (11”) from the bottom. Put sts on a thread.

Sleeves
CO 36 sts with contrasting colour. Work edge as for the back. Work st st until work measures 16 cm (6,25”) Bind off. Make another sleeve.

Assembly
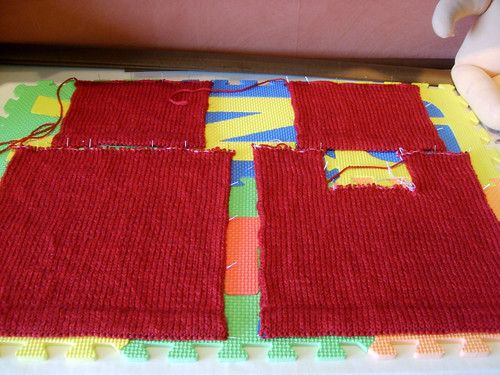
Soak all parts and block according to the sketch. Let dry. Kitchener the shoulders.


Collar
Pick up about 50 sts along the sides and back of the neck, from the right side. The number of sts should be a multiple of 4, plus 2 sts (for example 46, 50, or 54 sts) Knit ribbing, p2, k2 for 10 cm (4”) or desired length. Bind off in pattern.

Front neck
Move the 18 sts from thread to needle. Work one knit row from the right side and one knit row from the back for folding edge. Change to contrasting colour and work 3 rows st st. Bind off. Sew down the hem neatly.

Weave in all ends. Sew the sleeves to the front-and-back. Sew the side- and sleeve seams. Done!

Sunday, February 04, 2007

Sock bags

I've made sock bags for my Sockret Pal and me. I've seen bags like these around the net and if you can sew just a little it's not hard. My bags where first inspired by Trek and Beth and I was going to do the top like they did, because that's what I normally do. But when I had cut out all my pieces I found an excellent tutorial by Jessica with a very interesting and perfectly reversible drawstring top. So I used that one instead.

You need: Two fabrics, one for the outside and one for the lining. Cut two 12" (30 cm) squares of each. 1 yard (1 meter) cord/ribbon and one stopper.
Finished size: Bottom is 5,5" (14 cm) square, bag is 7,5" (19 cm) high.

Cut away a 3" (7,5 cm) square from the two bottom corners on all four pieces of fabric. Now put the two outside parts right sides together and sew the two side seams and the bottom seam. Do the same thing with the lining. I use a seam allowance of 1/4", because I'm a quilter, but anything goes, just be consistent. Maybe it's better to use a little wider seam allowance. Now the pieces should look like this:

Now press everything flat. Then, either press the seams open or press them to one side. If you press them to one side, check that the bottom seam and the side seam are pressed in different directions so that the seam allowances can be butted together when sewing the corner seams.

Pin and sew the corner seams. Press the seams flat and then press them open or to one side. Now both the outside and the lining should look something like this:

If you want to make a bag in another size just remember that the size of the cut-away corners are 1/4 of the width of the fabric piece for a square bottom.

I followed Jessica's tutorial for the top, so check that out. I made the first seam 1,25" from the top and the second one 0,75" from the top. Next time I will probably make the channel even smaller.

Here are my finished bags:


I found Zimmermania a while ago and have been checking it out since then. I have a couple of EZ's books and now I have finally started making something from them: a baby surprise jacket. Right now it looks rather weird:


but I think it's supposed to be folded like this:


and then it looks ok I think. I'm using yarn from an old project I ripped, I hope it's not too scratchy for the poor baby. Maybe I should wash it with hair balsam or something.